

 Nederlands
 Deutsch
Align woofer with shims (spacers)
The manual below discusses how we overhaul an Infinity 902-2864 woofer. The woofer is new, from an Infinity service center in Finland, but has been stored for so long that the foam surround and dustcap have perished. In this manual, the foam surround and the dustcap are replaced and the woofer is aligned using 'spacers' (shims).
This repair requires:
- Old newspapers to catch the old foam and glue residues, please note: the old foam gives tarry stains when it gets on the floor.
- A screwdriver. In some cases the woofer has to be soldered separately, a soldering iron is handy in that case.
- Red marker.
- Painter's tape.
- Thin blade.
- Wood chisel.
- Acetone or pure alcohol (DO NOT use nail polish remover or sticker remover please) and cotton swabs or kitchen roll.
- Sandpaper or a piece of a scouring pad.
- Weights such as magnetic tape, it doesn't have to be heavy.
- Clippers.
- Plastic to cut shims from, such as an old film roll, plastic tab for a ring binder or a thicker pocket for A-four papers.
- Glue.
- A brush.
- A syringe (makes the repair a lot faster and easier).
- A dustcap, in this case of 72 mm..
- A foam surround.
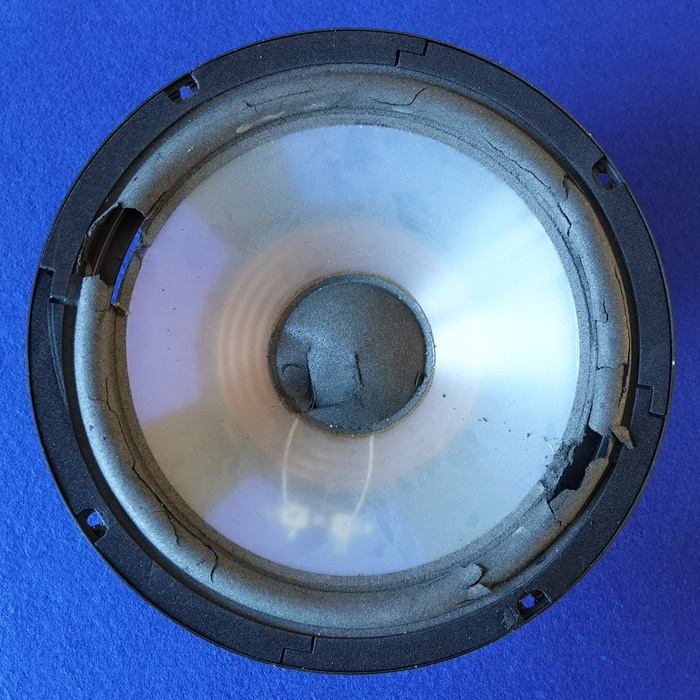
The woofer as it is. Note both foam surround and dustcap are damaged. We took this woofers from a shelve, but if it's in your speaker cabinet you have to remove it first. Be careful with your srewdriver. You won't be the first to apply too much pressure, pop out, and damage the woofer.
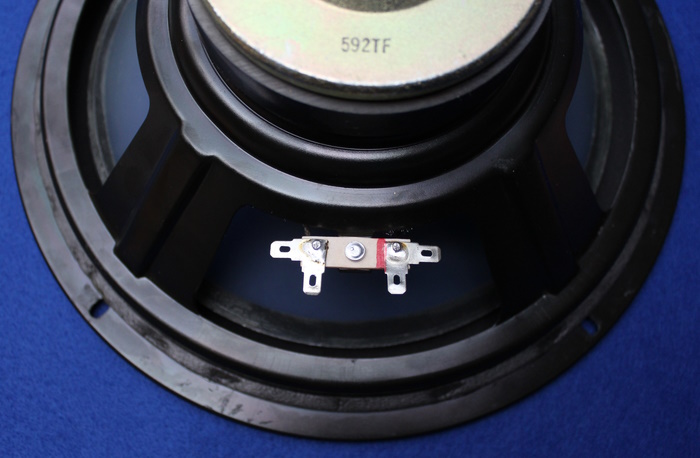
When the woofer is placed back in the speaker cabinet, the wires must be reconnected correctly. We therefore mark a pole of the connection terminal and make a note of which wire is connected to that pole. If the woofer is connected incorrectly, it will not move outwards, but inwards and produce 'anti-noise' compared to the other speaker. This leads to a bad sound result.
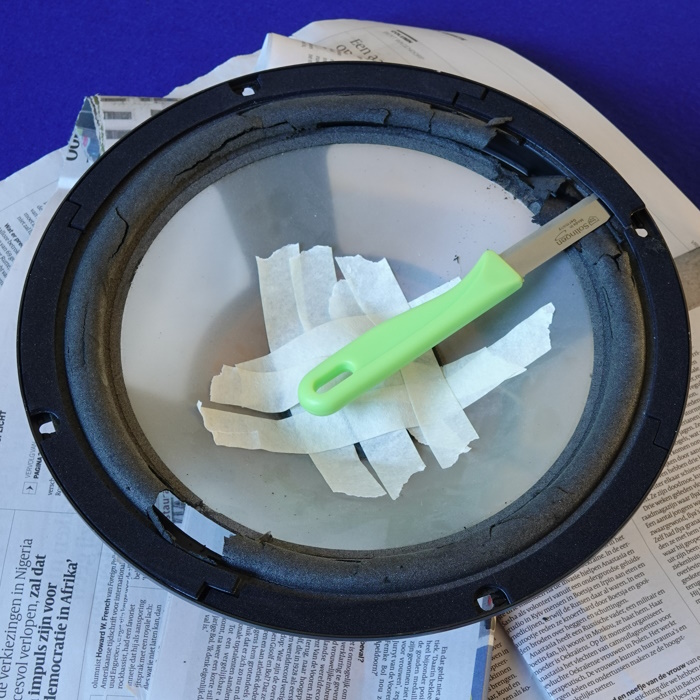
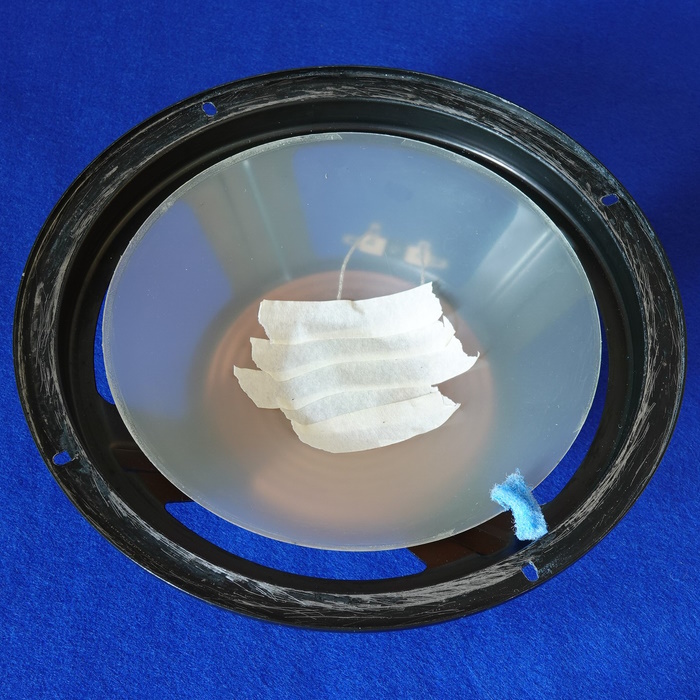
Because the dustcap of the woofer is damaged, dirt may get under the dustcap during repair. Under the dustcap is a very thin air gap that houses the woofer's voice coil. This coil moves up and down in the air gap when the woofer is in use. The air gap must remain free of dust and dirt at all times, which is why we tape the dustcap with painter's tape. Unfortunately we can't replace the dustcap at this stage of the repair as we still need access to the air gap to center the woofer later.
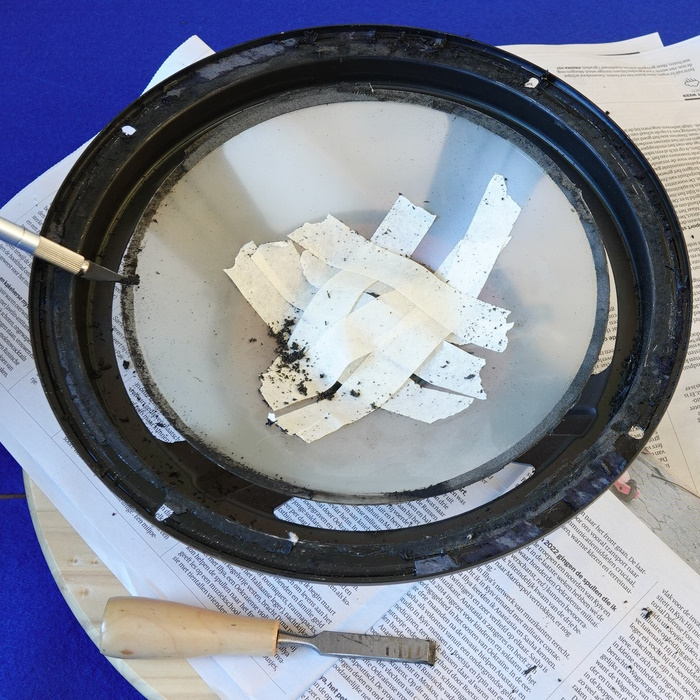
We start by cleaning the woofer frame. First we remove the decorative edge with a knife. The edge is also called the 'gasket'. This gasket can be reused if carefully removed. You can also install a new one after the repair. After removing it, the woofer frame is completely cleaned. We prefer to use a small sharp wood chisel for this. When most foam and adhesive residues have been removed from the metal frame, the frame is completely cleaned using alcohol or acetone. When the frame is completely clean, it can be roughened up a bit with fine sandpaper or a scouring pad to improve the adhesion of the glue.
The frame is almost clean except for some glue residue, now the remains of the edge of the cone must be removed. Because this is a plastic cone, we use a sharp knife to scratch off the foam and glue residue. It is best when the cone is completely clean. This is not always feasible with paper Cones, but usually it is with a Cone made of plastic or metal.
The woofer is now clean. The glue residue on the woofer frame turned out to be so hard that unfortunately the frame is scratched. That in itself is not a problem because the new foam surround is glued to the frame covering it. The cone is completely clean. We roughen the cone edge a little bit with an abrasive sponge.
Now the dustcap, it needs to be removed so we can access the air gap and the voice coil. An extensive manual for changing a dust cover can be found here. In short, you should pay attention to the following:
- Determine where the litz wires are located (photo below: right of the dust cover, under the cone. These wires connect the terminal to the voice coil)
- Carefully cut off the dust cover with a knife, starting on the side opposite the litz wires
- Be careful not to cut through a litz wire
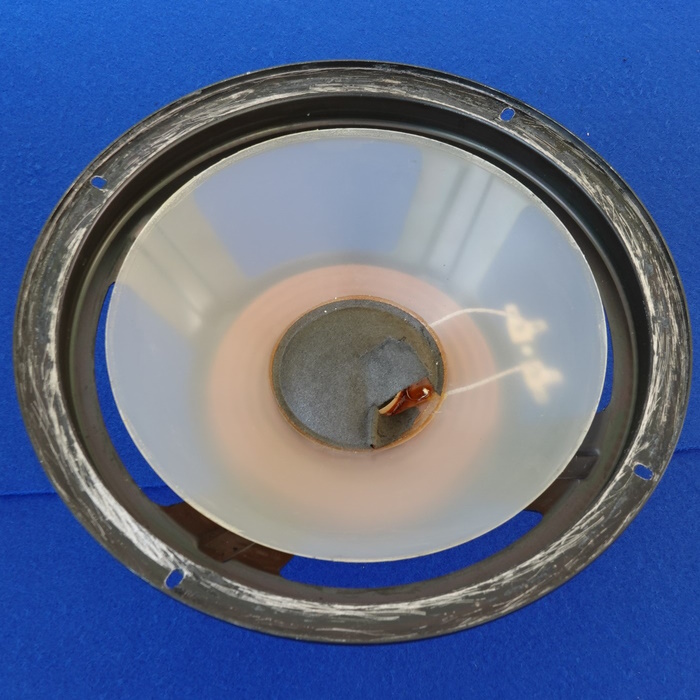
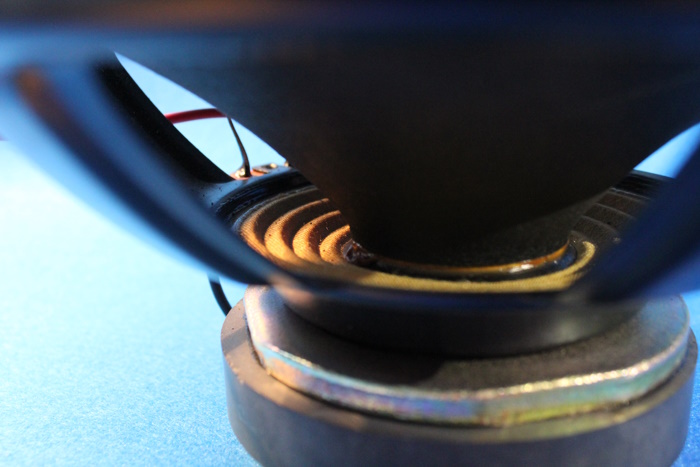
The dustcap has been removed. Under the dustcap is the voice coil that falls into the air gap of the magnet.
The adhesive residue of the old dustcap must be carefully removed. Be careful not to let any residue get into the air gap! If necessary, mask off the area around the voice coil with painter's tape.

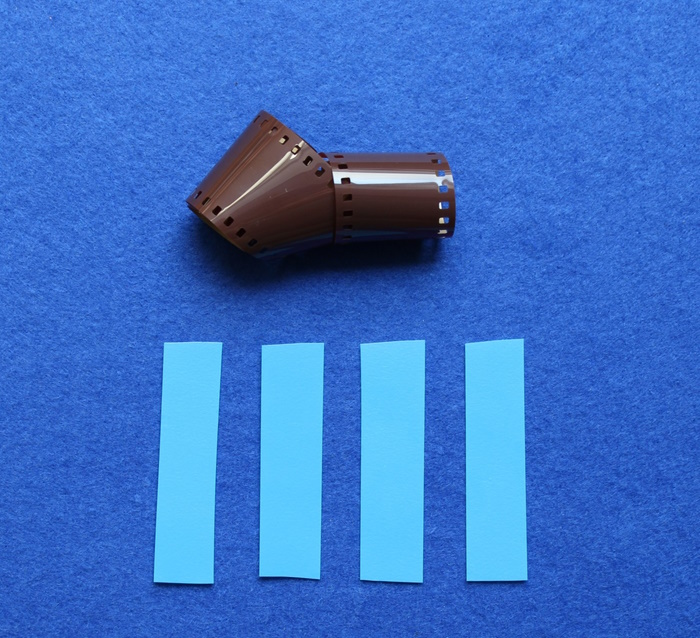
Now 'spacers' (shims) have to be made. We will later place these spacers between the voice coil and the magnet in the air gap. This prevents the voice coil from becoming unbalanced and keeps the coil in the center of the air gap. We make the shims from plastic. Suitable materials to make the shims are:
- photo negatives
- plastic from tabs
- etc
The shims should be in the shape of an elongated strip. Make sure they are long enough to remove them from the air gap. If necessary, test the depth of the air gap with a long piece of plastic first.
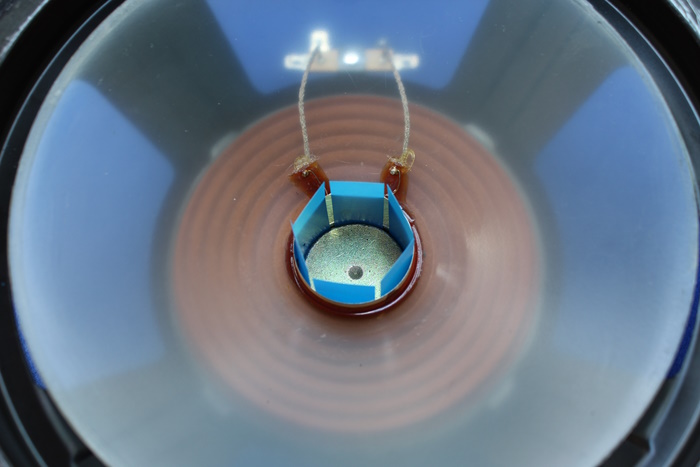
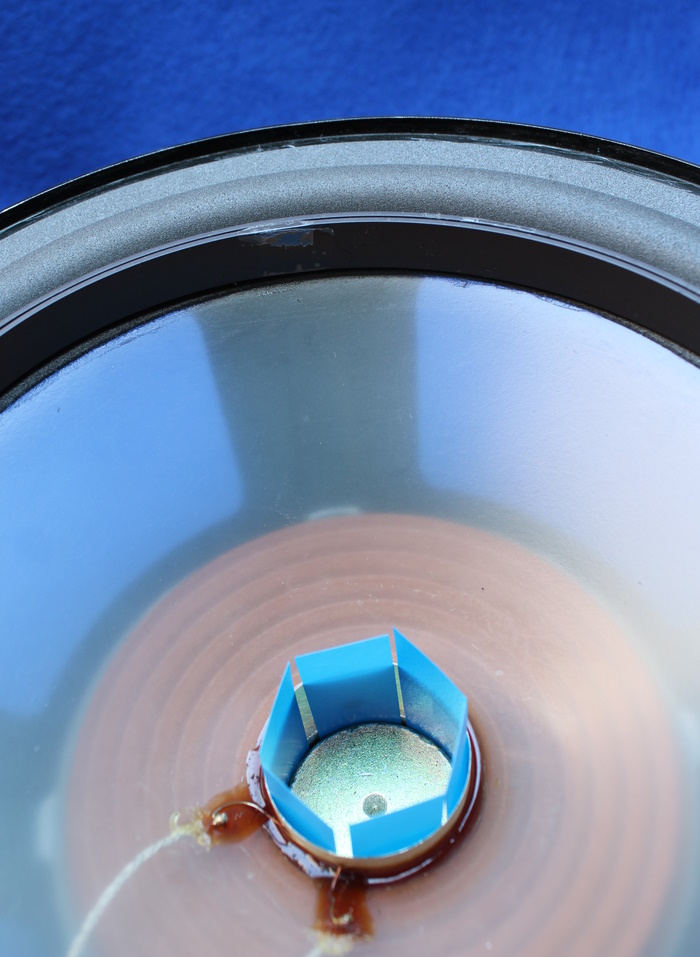
Place the shims in the air gap between the magnet and the voicecoil. The number of shims you use is at least four, but usually there will be more. With the shims you fix the voice coil in the correct position. Note: not only the horizontal position must be correct, also the vertical position.
Note the position of the spider. The woofer we repair is new, the spider (yellow ribbed 'plate' under the cone) still has its original strength. Used woofers often have a spider that has lost some stiffness. This can cause the cone to 'sink' slightly when the woofer is lying on its back. Place the shims so that the spider under the woofer is flat, not 'collapsed'. This ensures that the coil is in the correct vertical position relative to the magnet. You may need to 'lift' the woofer cone a few millimeters to do this.
Woofer with a healthy flat spider:

This spider has lost some strength and the cone 'sags'. The cone will have to be lifted slightly during 'shimming' when it is secured with shims. So far, that the spider is flat again.
Now that the voice coil is fixed in the right place, the foam surround can be placed. Apply glue to the outer edge of the cone, and to the outer lip of the foam surround.......

And glue the foam surround to the cone. Sometimes the glue adheres a bit difficult, because it dries slowly. A weight on the inner lip of the foam surround can offer a solution. We put a piece of magnetic tape on the inner lip of the foam surround to keep it in place.
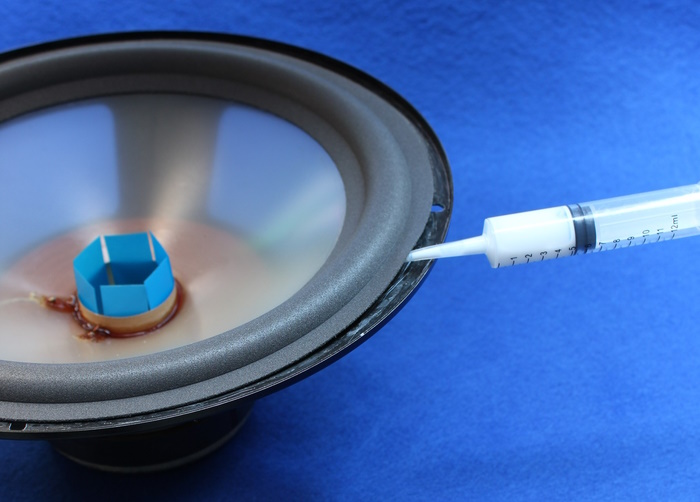
We let the glue dry. When the inner lip is glued to the cone, we glue the outer lip of the foam edge to the frame of the woofer. A syringe will then come in handy.
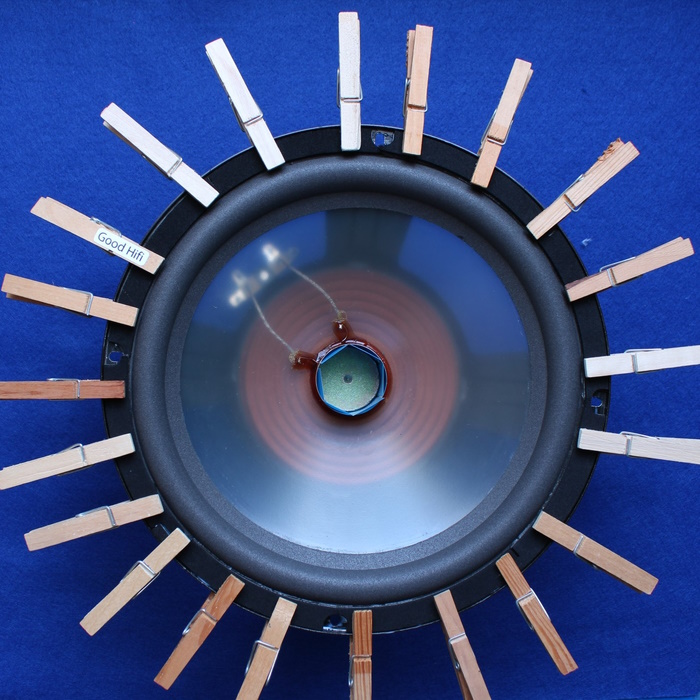
While the glue is drying, we secure the outer lip of the foam surround with pegs. Because this woofer had a decorative edge, we also put it back, we place the pegs on the decorative edge (gasket). The drying time of the glue depends on the amount used, we use a minimum of 12 hours as drying time.
When the glue used to apply the foam surround is dry, the new dustcap can be placed. An extensive manual can be found here.
In brief:
- Remove the shims from the air gap
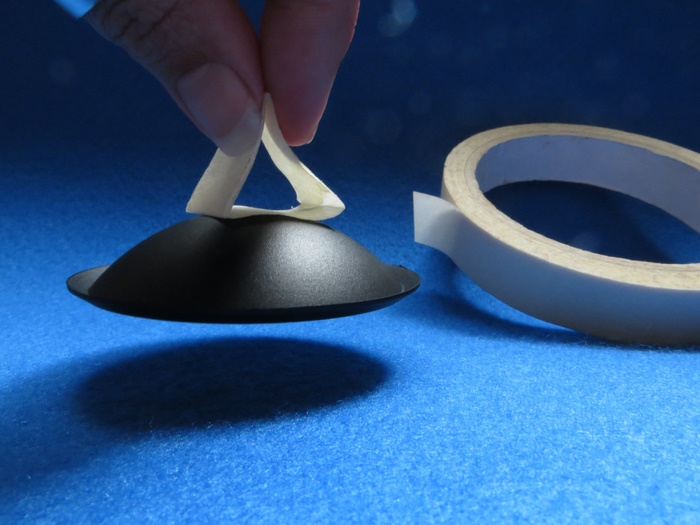
- Place a piece of painter's tape on the dustcap to lift it easily
- Apply glue to the glue edge of the dustcap
- Place the dust cap in the center of the cone
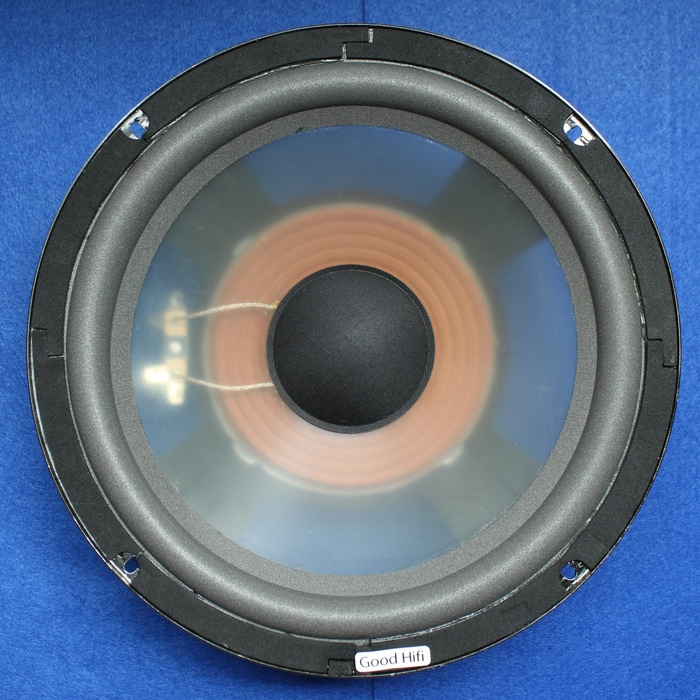
The Infinity 902-2864 woofer after repair. The woofer can now be placed (back) in the cabinet.
© Good Hifi VOF