

 Nederlands
 Deutsch
Replace B&W Continuum FST midrange
What is a Continuum FST midrange?
It is a special midrange that is/was used by Bowers & Wilkins in the more expensive series. The midrange is made of a special material and is attached to the cabinet in a special way. The midrange is not, like many speakers, attached to the front of the cabinet with screws, but is hung 'floating' (decoupled) to achieve better sound quality. Due to this construction, specific knowledge is required to remove this midrange from the cabinet or to place it (back) in the cabinet. Here we explain how.
This instruction is based on a B&W 702 Signature speaker. The procedure is valid for all similar Continuum cone FST midrange drivers. We try to explain as fully as possible how the procedure works, but carrying out the procedure is your own responsibility. If in doubt, contact a B&W specialist!
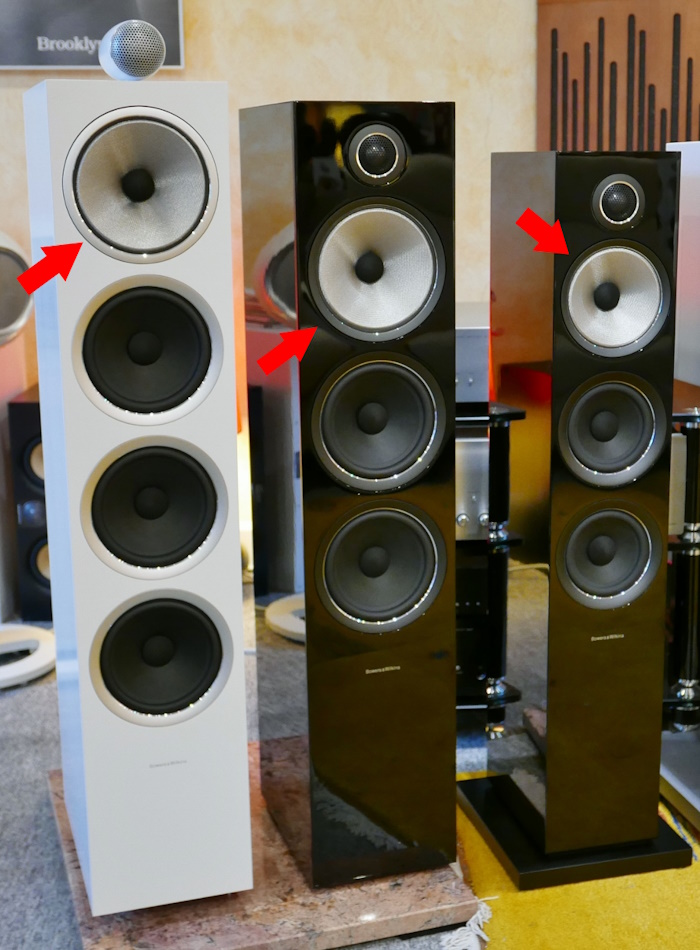
How do I recognize a Continuum FST midrange?
- The midrange's cone is made of Continuum (gray, Kevlar-like) material.
- The midrange has a metal decorative edge, normal midrange usually has a plastic decorative edge.
- The midrange is not 'fixed' in the cabinet but can be moved slightly to the left and right, up and down. This last point distinguishes the Continuum FST midrange 100% from other midrange drivers.
If in doubt, check the speaker's documentation to see if it contains a Continuum FST midrange driver.
The Continuum FST midrange is used, among others, in B&W's 700 series.
The Continuum FST midrange is mounted in the cabinet using a metal pin that extends through the magnet of the midrange. The end of the pin has a screw end. The midrange is clamped in the cabinet using the pin and a bolt. The pin and bolt are 'hidden' behind the dustcap of the midrange driver. You can carefully (!) pry the dustcap loose with your nails. Be careful not to damage the dustcap or (worse) lose it. The dustcap is not available separately as an item. Behind the dustcap are the magnet (super strong!), the coil, the air gap of the magnet, the pin and the bolt.
To prevent dirt or dust from entering the air gap, it is important that the dustcap is only removed in a clean environment!

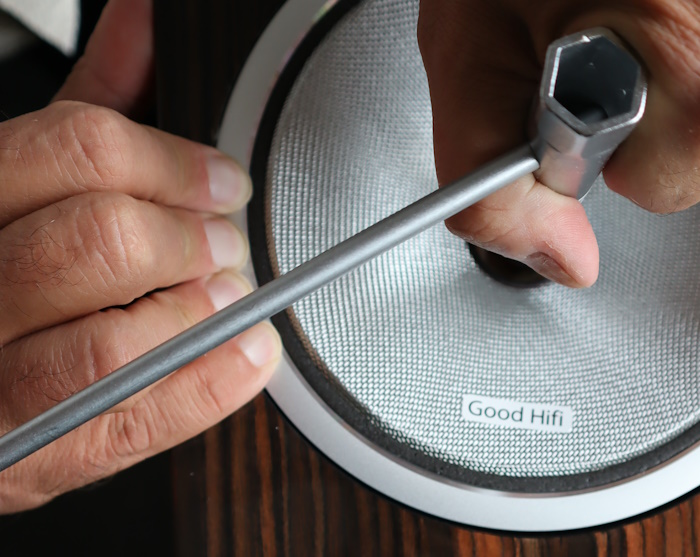
The bolt on the pin can easily be loosened with a pipe wrench (European size 15). To do this, do the following:
- Carefully place the pipe wrench on the bolt. Please note: the strong magnet will attract the pipe wrench, keep the pipe wrench under control!
- Place a screwdriver, or other tool, in the hole of the pipe wrench to create a lever. Too little force can be exerted using the key alone.
- Hold the (metal) edge of the midrange with one hand. The midrange is not bolted to the cabinet and tends to rotate when not held down.
- Now, using the lever, loosen the bolt. Not much force is required. The bolt is a 'normal', right-handed bolt.
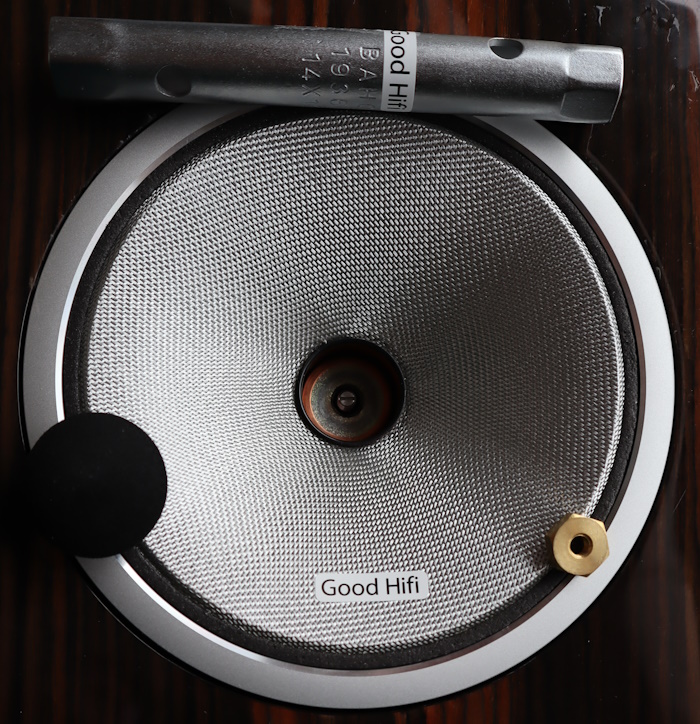
The magnet of the midrange driver is so strong that it can support its own weight. Once the bolt has been loosened, the midrange can be carefully (!) lifted using the pipe wrench. The midrange can also be lifted by the metal decorative edge, but this may damage the (lacquer of the) cabinet.
The dustcap has been loosened on this midrange, and the bolt is also loose using the pipevrench. The midrange can be lifted out of the cabinet. The only thing now holding the midrange in place is gravity.
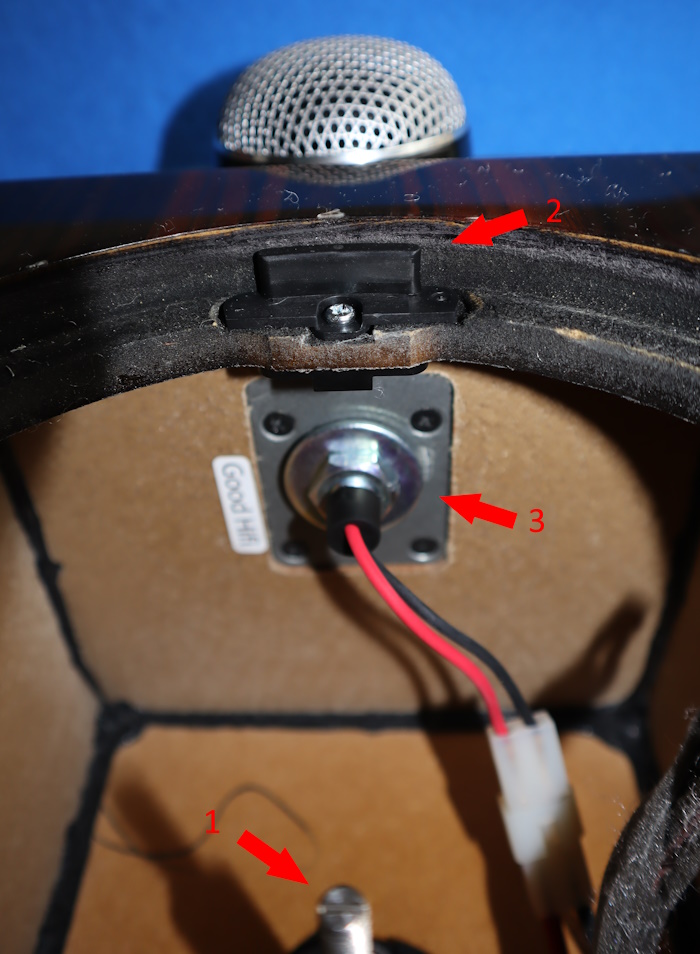
This is the inside of the speaker cabinet. Not all internals are identical, but they have a number of features in common. The numbers refer to the numbers in the photo.
- This is the pin to which the midrange speaker is attached. As far as we know, this part is not (or very difficult to obtain) available. So be careful with it!
- This is a 'decoupler'. Depending on the speaker series, several are used. The 'decouplers' can have different sizes depending on the series used. They are secured to the cabinet with screws and prevent the midrange from direct contact with the speaker cabinet / baffle. They also prevent the midrange from moving.
- This is the mounting of the tweeter on top of the speaker cabinet. B&W supplies speakers with the tweeter mounted in the front plate, and speakers with the tweeter mounted in a separate housing on top of the cabinet. In the latter case you will find this installation.
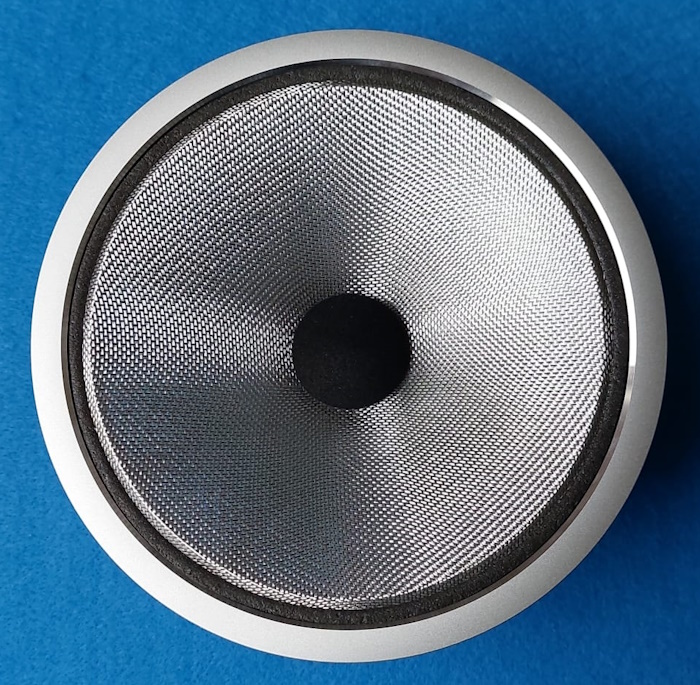
This is the Continuum FST midrange with removed dustcap. The metal decorative ring is part of the midrange. Depending on the version of the speaker, it is light or dark in color. The ring is attached to the Continuum FST midrange with sealant. There is no reason to loosen the decorative ring. There are no screws or other attachment points under it.

This is the midrange as you purchase it, with a fixed decorative ring and attached dustcap.
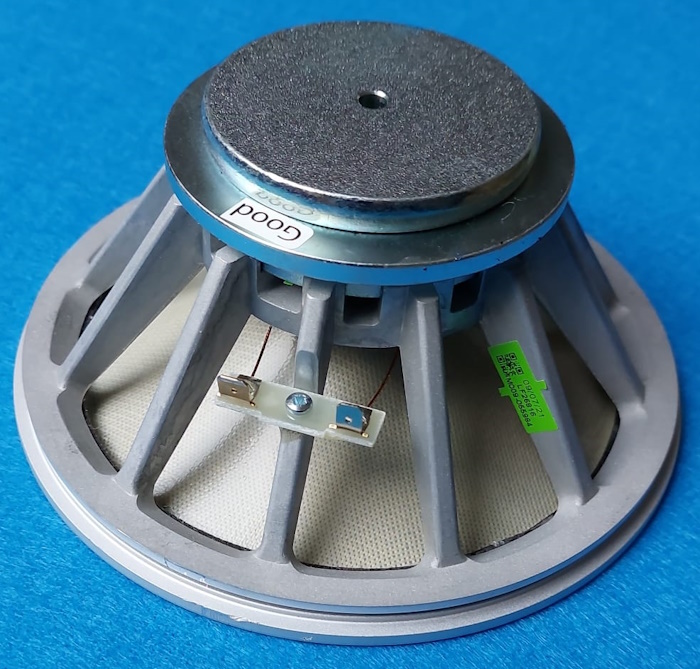
Here you can clearly see that the magnet has a hole through which the pin protrudes. In this case the midrange is the LF26816, but B&W replaces it with:
LF27154 Dark Trim
LF27162 Light Trim (The midrange drivers of these item numbers are identical, but the color of the trim differs.)
Different midrange drivers are used in different B&W speakers. Make sure you buy the right midrange driver!
Replacing the midrange is done in the following order:
- Remove the old midrange from the cabinet, see instructions above.
- Remove the dustcap from the new midrange.
- Place the new midrange in the speaker cabinet, on the 'decouplers' and the pin. The new midrange is enclosed by the 'decouplers'. The pin protrudes through the hole in the magnet.
- Screw the bolt onto the pin while the midrange is held on the (decorative) edge. Use the same force as when the midrange was removed from the cabinet.
- Place the dustcap back into the center of the midrange.
© Good Hifi VOF