

 Nederlands
 Deutsch
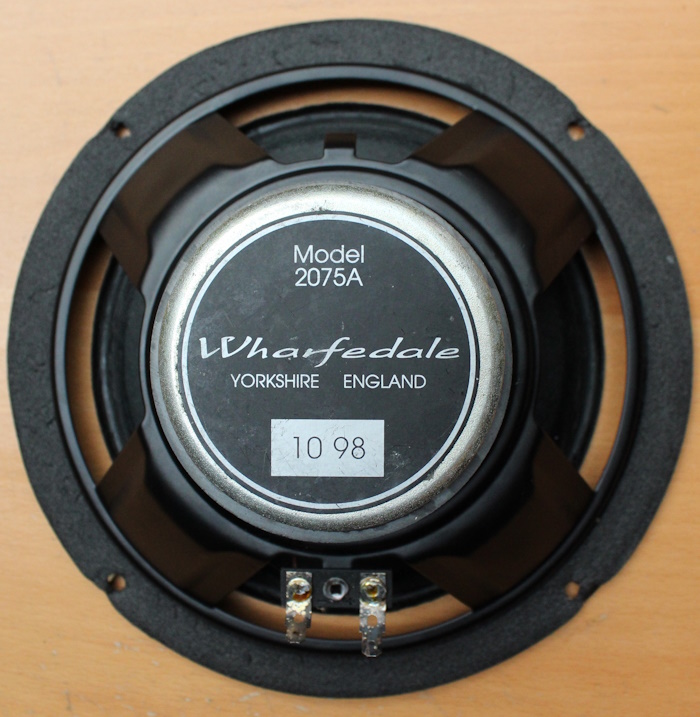
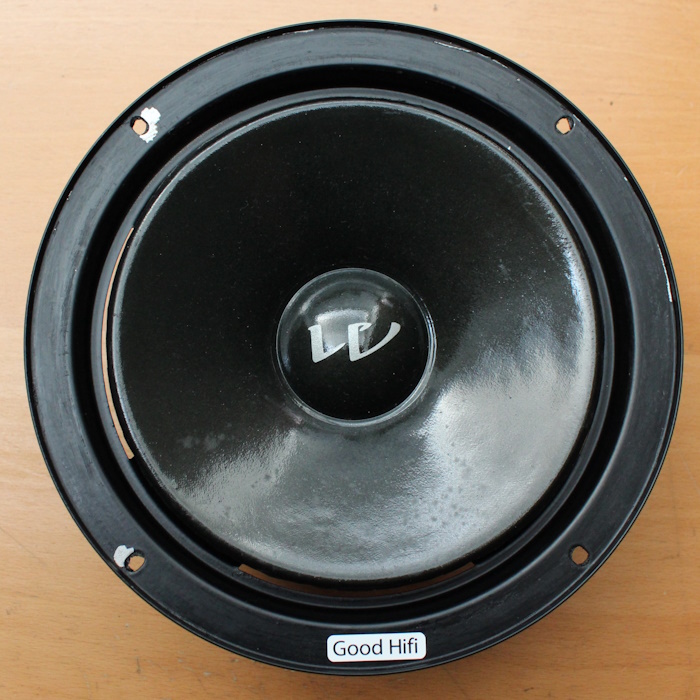
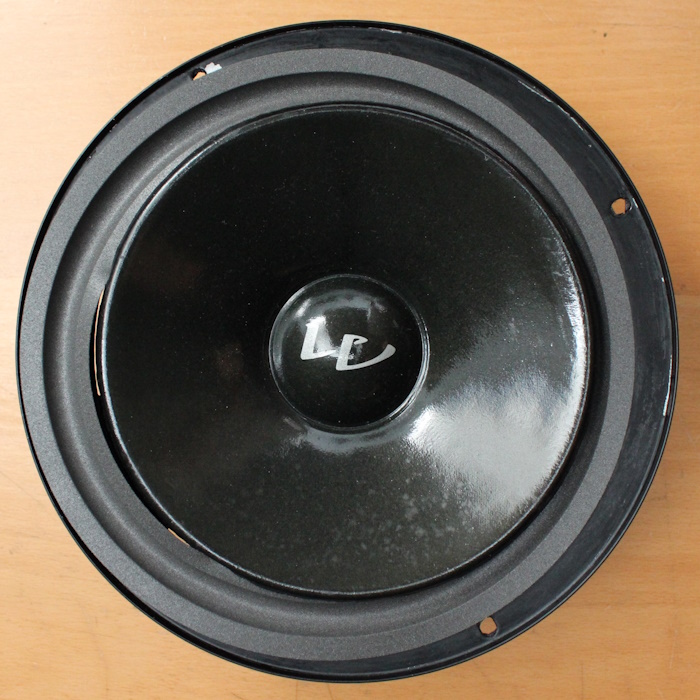
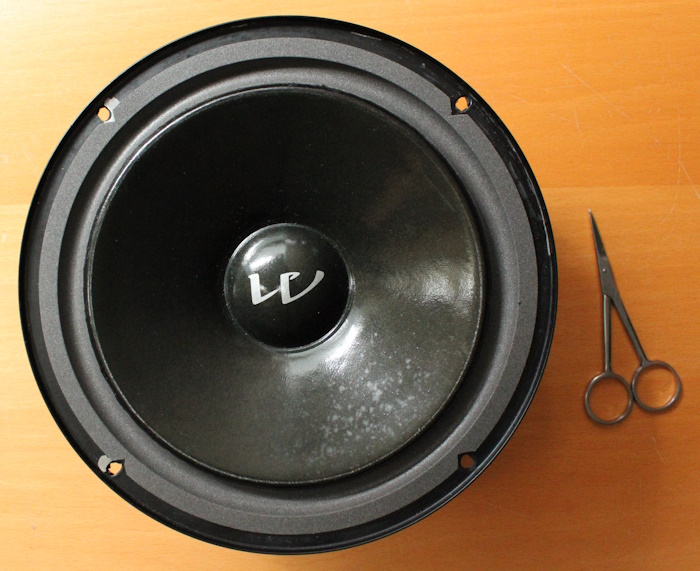
Inverted foam surround on Wharfedale 2075A woofer
Most woofers are equipped with a foam or rubber surround that is mounted 'convex'. That is, the curvature of the edge points outwards. There are also woofers with an inverted (concave) edge. These surrounds are generally more difficult to replace than surrounds that are 'convex' mounted. In this lemma we explain how these 'inverted' mounted surrounds can be replaced.
In this case we replace the foam surround of the Wharfedale 2075A woofer, the 2074B woofer from Wharfedale uses the same surround. This manual is therefore also valid for the 2074B woofer. These woofers are used, among others, in the Valdus series.
First, the woofer must be removed from the speaker cabinet. Unscrew the woofer from the cabinet and take a picture of the connected wires. The wires must be reconnected properly after the repair. Mounting 'inverted' is a tricky job that does not work well when the woofer is still in the cabinet.
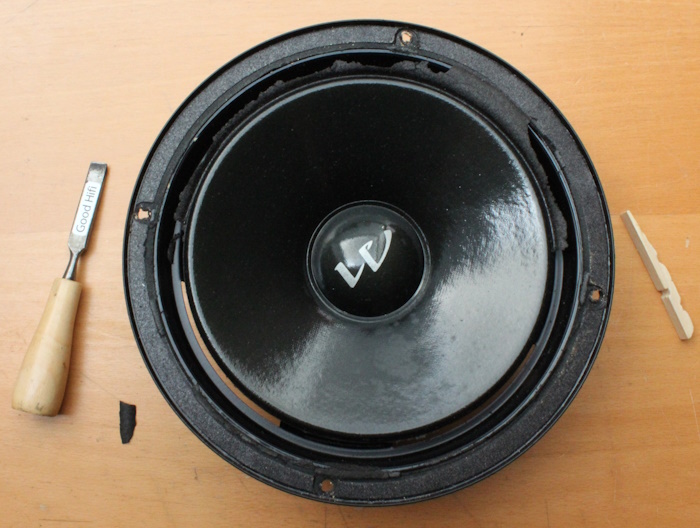
We found the woofer in the condition shown in the photo below. The foam surround has largely disappeared, but a partt of the surround is still visible. The photo also shows two tools that can be used for cleaning the woofer, a wood chisel and a (cloth)peg.
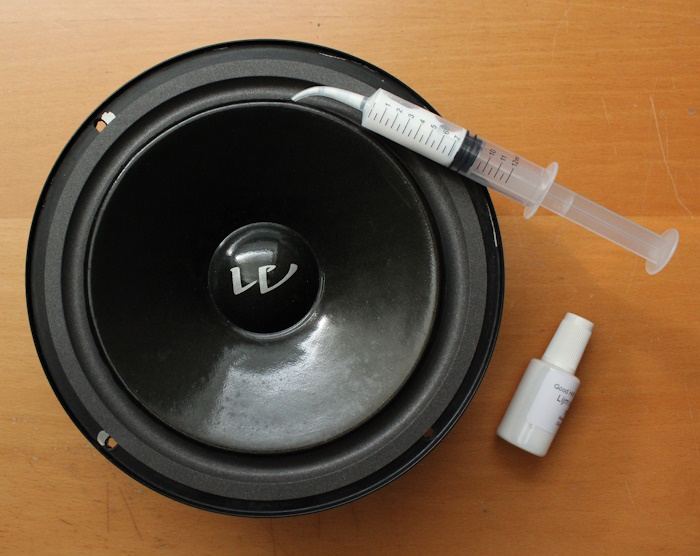
For this repair we used the following tools:
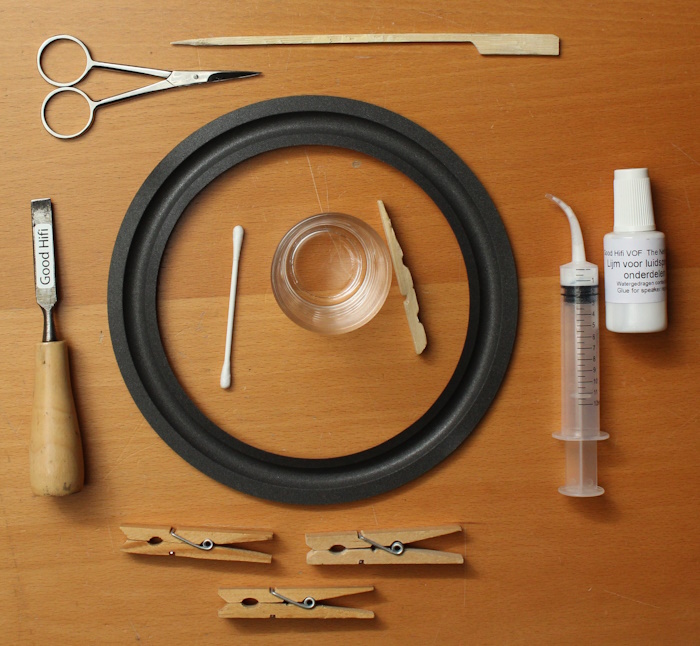
- The correct foam surround
- Speaker Glue
- A syringe to apply glue
- A wood chisel and part of a peg
- A pair of scissors
- A wooden spatula
- Cotton swabs
- Pure alcohol
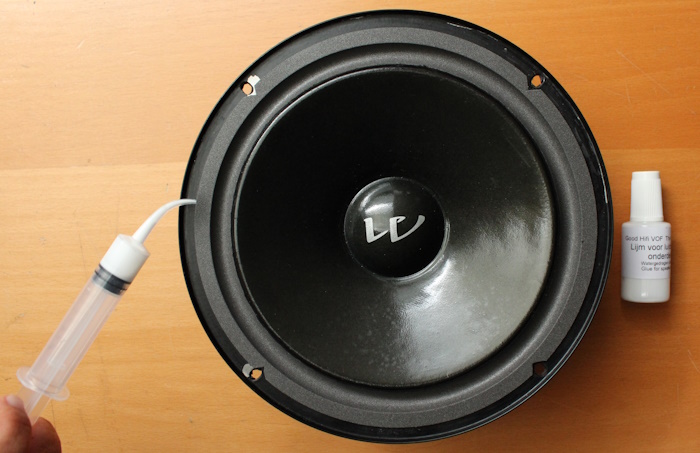
Before the new foam surround can be glued to the Wharfedale woofer, the old foam surround must be removed. We first remove the old foam surround from the woofer cone, then from the frame.
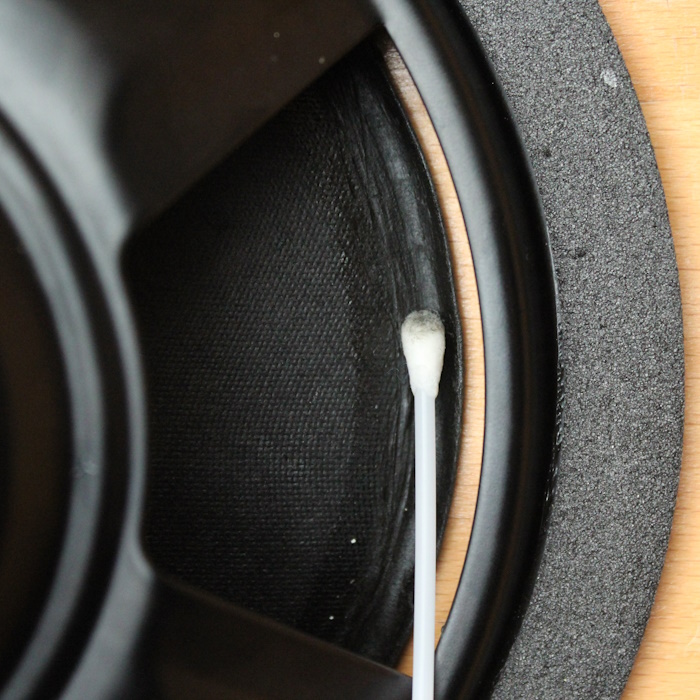
To clean the cone, we place the woofer upside down, with the magnet facing up. With a cotton swab dipped in pure alcohol, we carefully remove the old foam edge from the back of the cone.
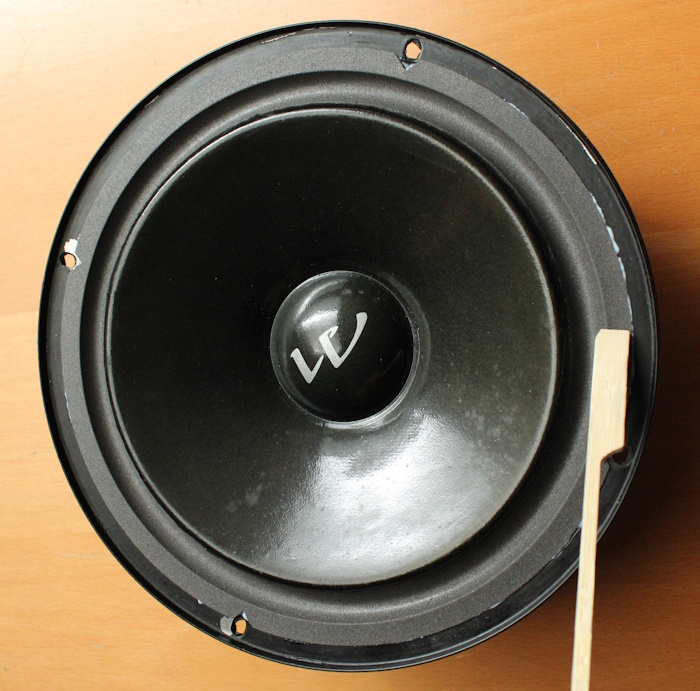
Cleaning the woofer frame is easier. More force can be applied here. Clean the frame as much as possible. The old foam surround can be removed with a wood chisel, peg, and cotton swab with alcohol. Finally the frame is clean:
During cleaning, the paint of the woofer frame may become scratched. That doesn't matter. It makes bonding of the glue later in the process even easier.
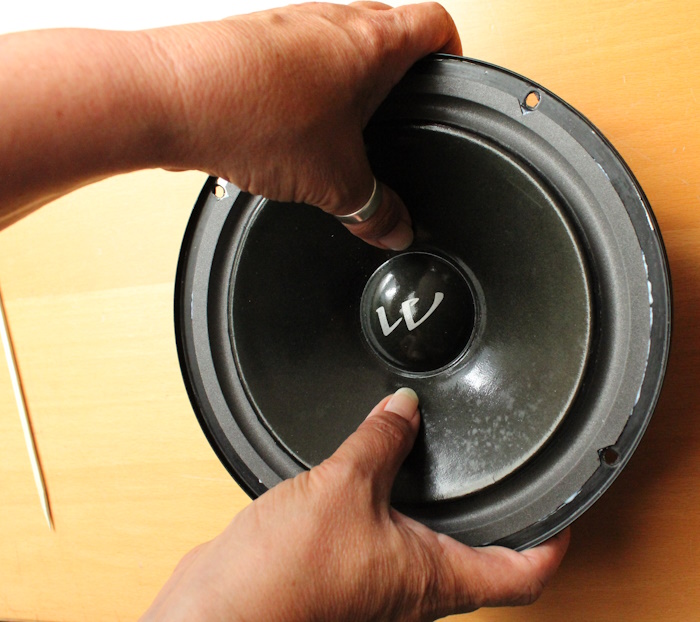
Now take the foam surround and place it upside down, with the bulge facing down. Now carefully slide the foam surround under the cone of the woofer:
When the foam surround is completely under the woofer cone, slide it into place with the bulge down. The roll (inverted) of the foam surround must fit nicely with the cone. We use this specially developed surround for the repair.
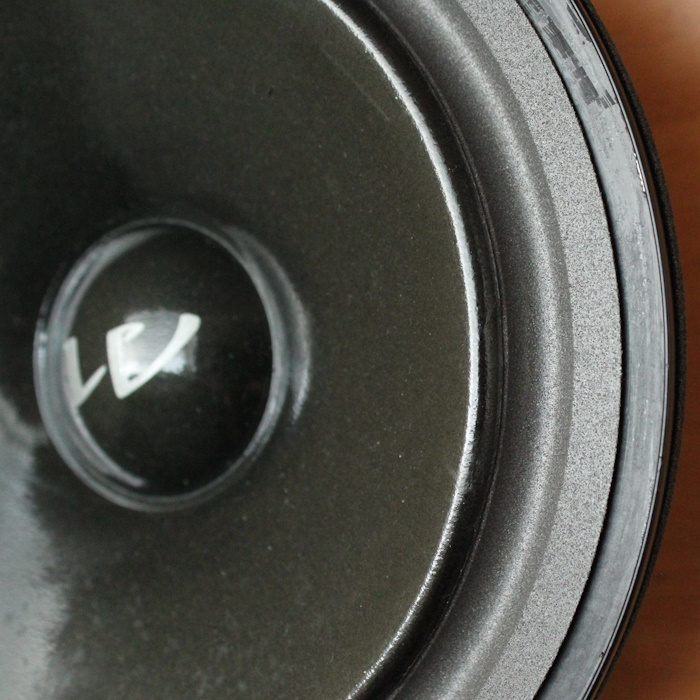
Make sure that the foam surround fits nicely around the speaker cone:
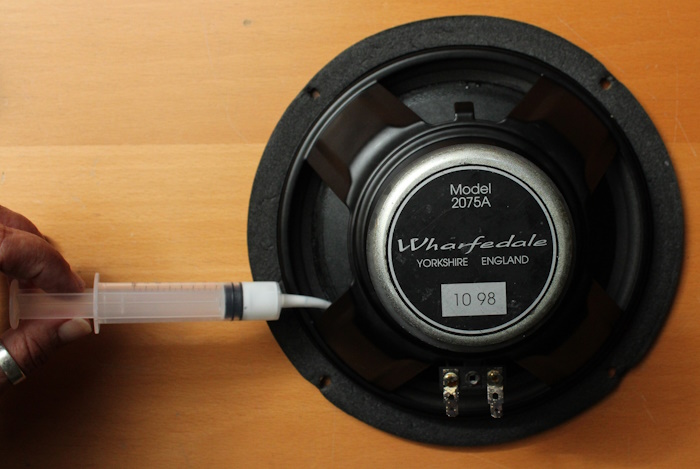
When the foam surround is in place, it can be glued to the cone. Because the 'lip' of the foam surround is behind the cone, we use a syringe to apply the glue.
It is also possible to place the woofer upside down and apply the glue from the back with the syringe. Most 'beginners' choose this method because you can better see the repair. Make sure that the foam surround does not shift!
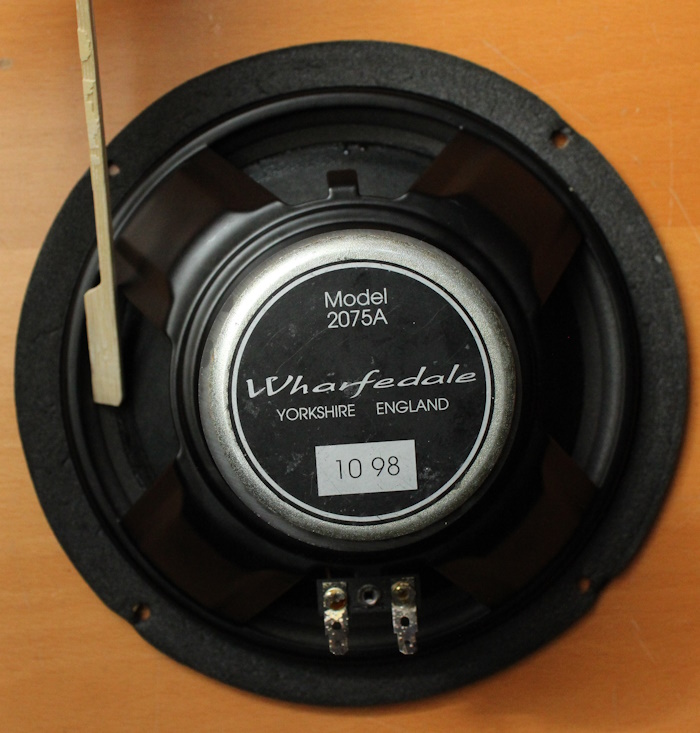
With a wooden spatula, we carefully press the adhesive edge of the foam surround onto the edge of the cone for better adhesion:
Now let the glue dry. The glue dries fairly quickly (especially on the paper cone), but we recommend putting the woofer away for at least 12 hours. The foam surround can then be glued to the frame.
Step 2: Glue to the frame.
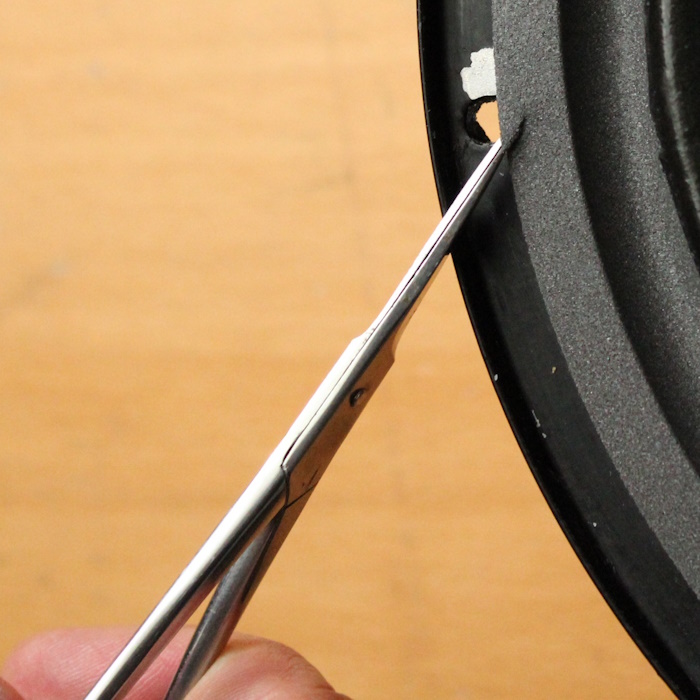
This Wharfedale woofer has screw holes over which the foam surround partly falls. It is recommended to slightly 'cut' the foam surround at the screw holes. It prevents the foam surround from being damaged when tightening the screws.
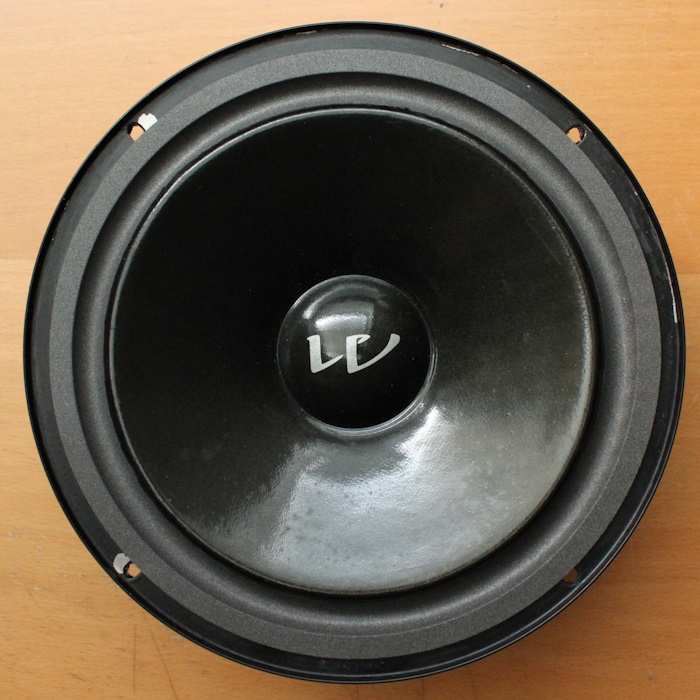
The foam surround is now glued to the cone, the glue has dried, and the screw holes have been made 'free' so the screws won't damage the surround.:
Now apply the glue between the woofer frame and the foam surround. Again, this is easiest with a 'syringe'. Another way is to lift the foam edge slightly and apply the glue to the frame with a brush.
Make sure that the glue is well distributed over the entire surface. We 'spread' the glue by spreading it all around with a wooden spatula over the glue surface:
Now test whether the coil of the woofer 'runs freely' in all directions by gently pressing the woofer.
Clips are placed all around and the woofer is tested until the coil runs freely in all directions.
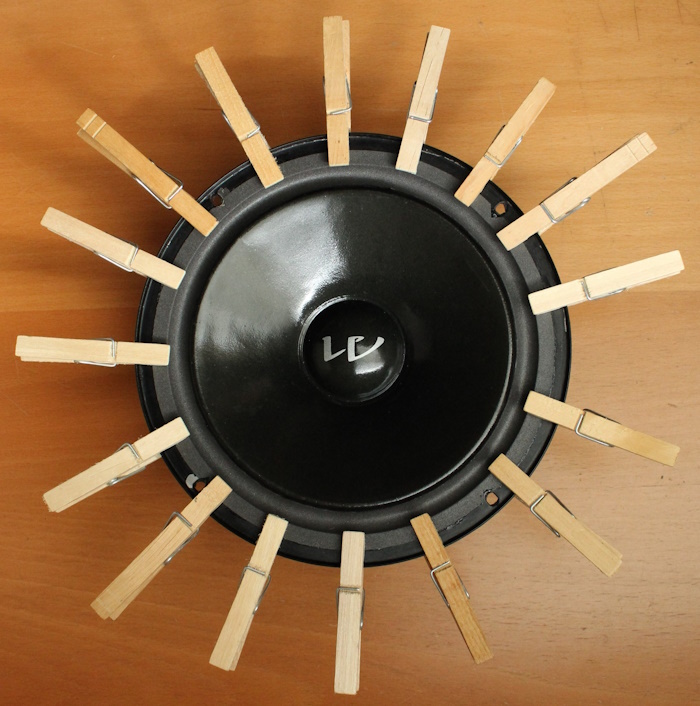
Here is an extensive manual for centering with pegs. You can also opt for 'shimming' to center the woofer. This method is 100% reliable but more difficult to perform.
When the foam surround is glued to the frame, let the glue dry again. Again use the 12 hour period. After this period, the woofer can be placed back in the cabinet. Make sure the wires are connected correctly.
© Good Hifi VOF