

 Nederlands
 Deutsch
Restore silk tweeter dome
The dome (the moving membrane) of dome tweeters can be made of different materials. A common material is (artificial) silk. This material is finely woven and pressed into the dome shape. A coating is then often applied to ensure that the membrane is and remains 100% airtight.
Over time, substances in the air (smoke!), sunlight, dust, mechanical wear and temperature differences can cause the dome to 'wear out', become contaminated or even develop cracks in the coating. The sound quality of the tweeter suffers. A tweeter that is not 100% airtight cannot reproduce the sound properly. Insufficient pressure is built up due to an acoustic short circuit, causing the high tones to be less clear in the sound image or even disappear completely.
Situation 1: Silk dome with minor (1-2 mm) damage:
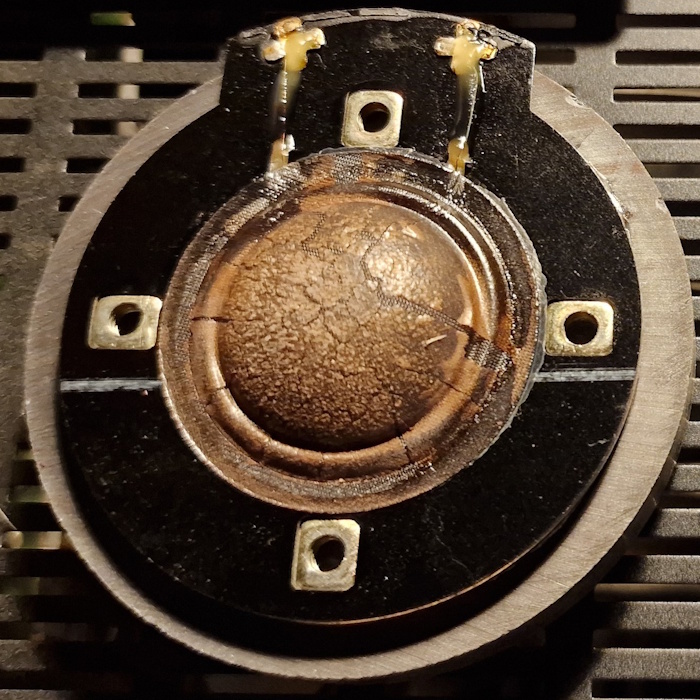
Here is a photo of a dome that no longer functions properly:
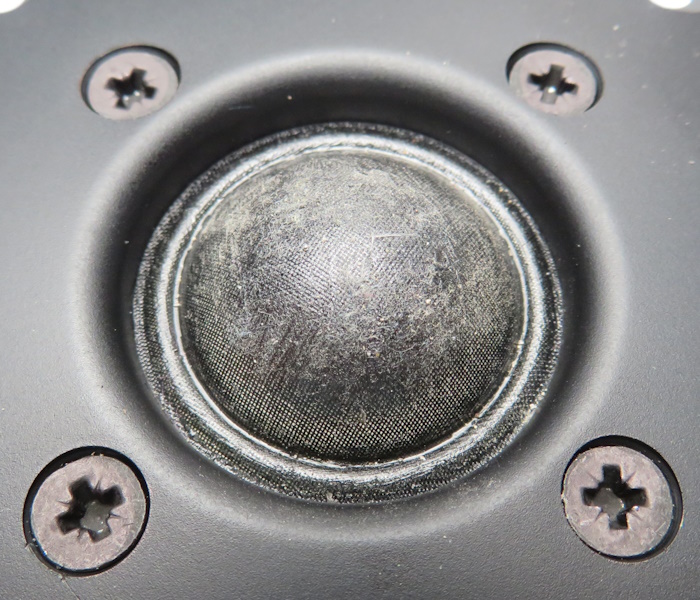
The dome is dirty, there is a thick layer of dust on it and the coating no longer covers the entire dome. As a result, this tweeter plays outside the specifications for which it was designed. This will make the speaker dull.
In this section we will explain how dirty domes, and domes with a damaged coating, can be repaired.
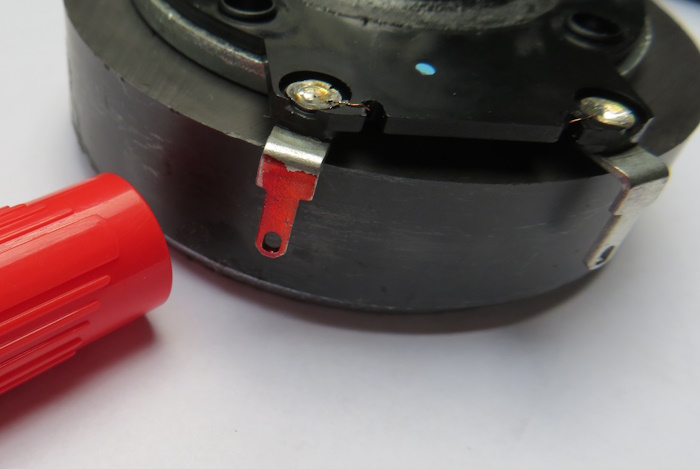
As a first step, remove the tweeter from the speaker cabinet. Usually the tweeter is screwed into the cabinet (sometimes the screws are under a decorative ring), but sometimes there is another mounting method. Specific instructions can often be found on the web. Sometimes we can tell you how it works. When the tweeter has been removed from the cabinet, it is important to mark the poles of the tweeter so that the tweeter is reconnected correctly after the repair. By default we mark the positive pole of the tweeter.
Next, the silk dome needs to be cleaned. This is often easiest when the front plate of the tweeter is removed. Sometimes that is not possible, in which case we can make do, but the dome can still be cleaned as best as possible. We use a soft damp cloth with a mixture of water and some dishwashing liquid for cleaning. Mix it well before applying it to the cloth. The dome can be carefully cleaned with this cloth. Do not apply force, work carefully, and ensure that the cloth contacts the tweeter dome several times. Always use a different (clean) part of the cloth.
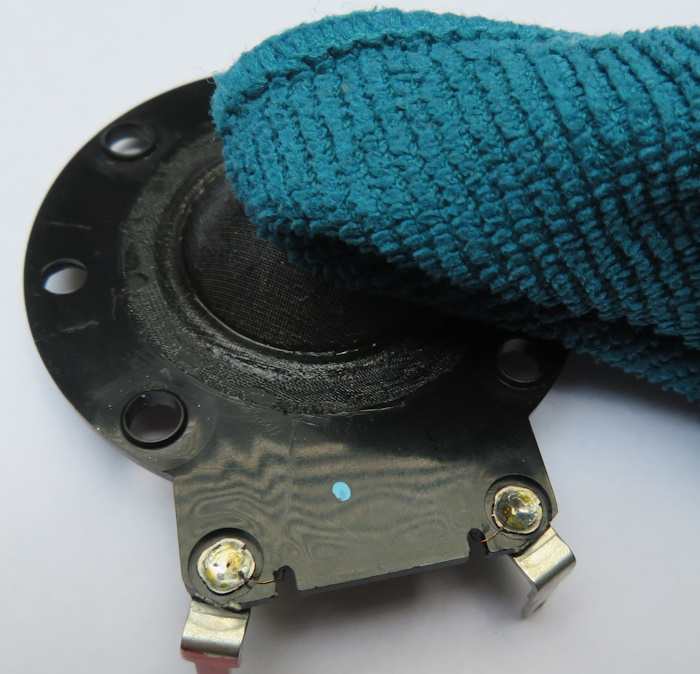
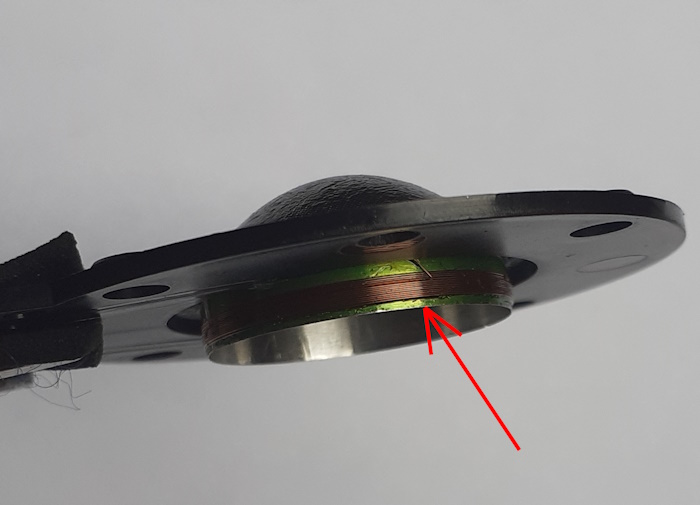
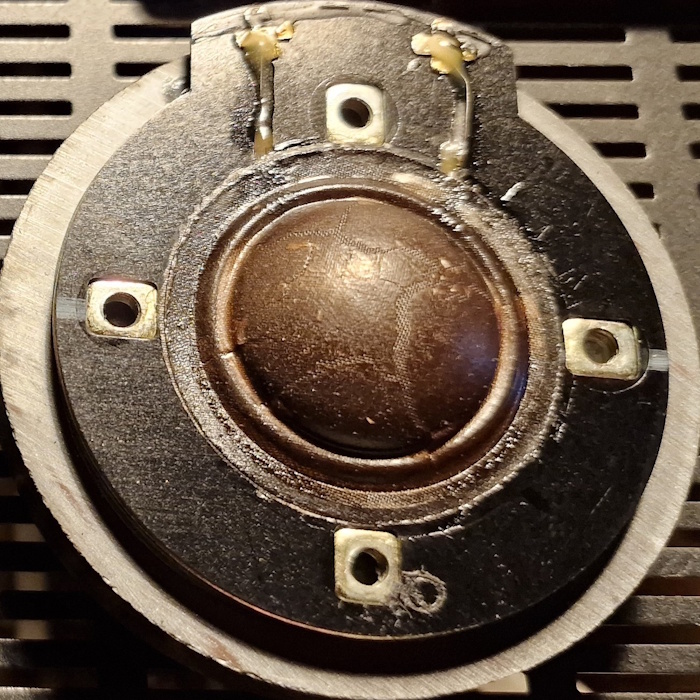
The photo above shows the diaphragm of the dome tweeter. We have removed this from the tweeter so that we can easily access everything. In that case, be careful not to damage the voice coil (on the back of the dome)!
Once the silk dome has been cleaned it is time to inspect the condition of the coating. A magnifying glass can come in handy here. Most domes are only about 2.5 centimeters in size....
Our dome clearly shows that there are places where the coating of the dome is damaged or has even disappeared completely:
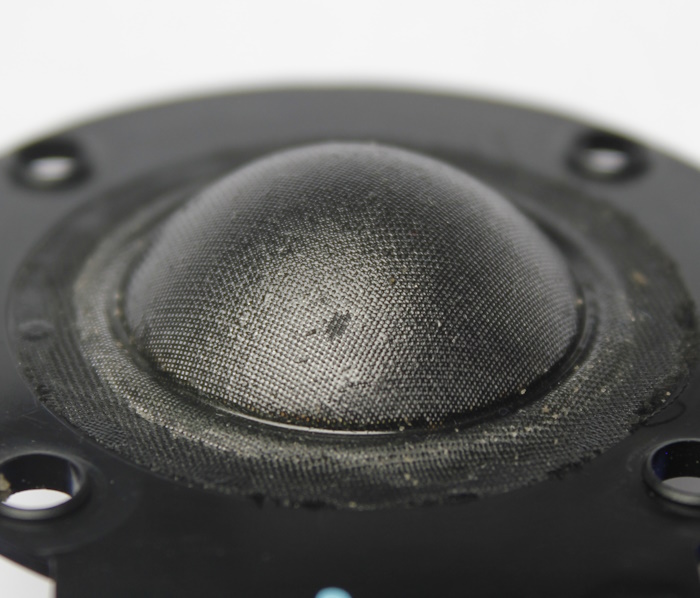
Where the coating is damaged, the dome is no longer airtight. Part of the air pressure that the dome builds up at the front will 'leak' through these holes. The result: lower sound pressure, less audible high tones.
A new coating must be applied in places where the coating is damaged or has even disappeared. You can also choose to apply a new coating to the entire dome. In most cases that is the best solution.
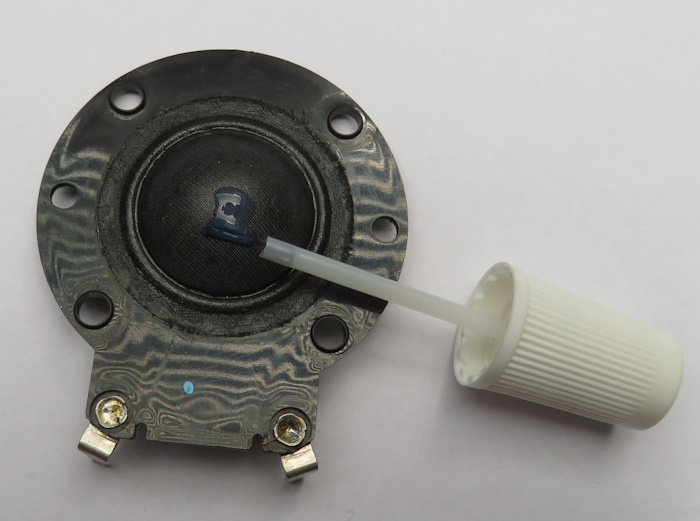
Do not apply force when applying the coating. Apply the coating carefully so that the dome is not deformed.
Because our tweeter has several places where the coating has disappeared or been damaged, we opt to re-coat the entire dome:

The coating we use for this repair comes from a speaker manufacturer. So this is a special product, not something that is on the shelves of the do-it-yourself market.
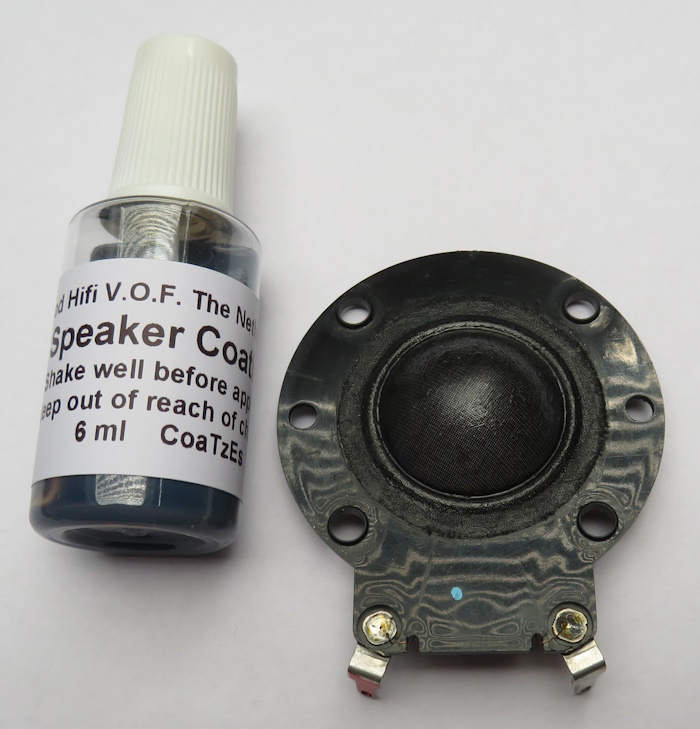
The coating we use is applied in one (1) single layer. The drying time is approximately 24 hours at room temperature. One bottle contains enough coating to repair multiple dome tweeters.
When the coating is dry, the tweeter can be reassembled. We place the diaphragm back on the magnet. Make sure the tweeter's voice coil is completely clean::
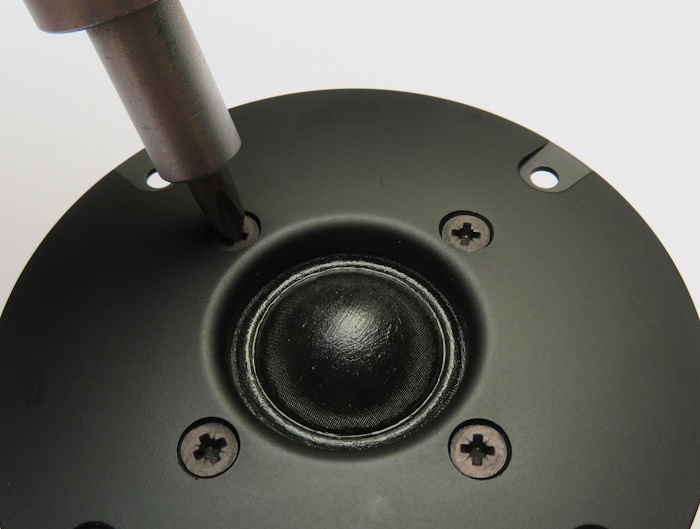
We screw the front plate onto the diaphragm. Do not overtighten the screws.
Now the tweeter can be placed back into the speaker housing. Connect the wiring correctly. If the correct markings have been made, this is easy to do.
Situation 2: Silk dome with more extensive damage (>=2mm):
Some domes don't have a single small spot where the coating is damaged, but multiple, larger spots where the coating is damaged or missing, as shown in the photos below:
The dome above has almost countless smaller and larger spots where the coating is damaged.
This dome has several wide cracks in the coating that are larger than 1 to 2 mm.
In the above cases (extensive, or very damaged areas) removing the old coating beforehand provides the best result. First, carefully remove as much of the loose coating as possible with a dry brush or tweezers. Then, use a small amount of solvent (e.g., acetone) on a cotton swab to remove any remaining coating. After removing the coating, clean the dome with a slightly damp microfiber cloth and lukewarm dish soap and let it dry. Once the dome is completely dry (wait at least 24 hours), apply the new coating.
© Good Hifi VOF