

 Nederlands
 Deutsch
Beovox C40 woofer revision
Overhauling a heavily damaged woofer from a Bang & Olufsen Beovox C40 loudspeaker. We perform the following actions:
- We replace the dust cap
- We color the cone, the frame and the new dust cap
- We reinforce the cone with a coating
- We place a new foam surround
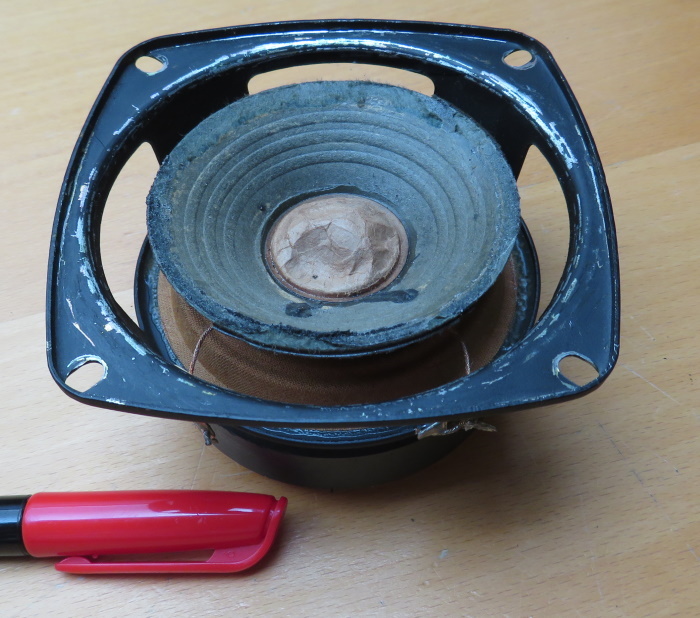
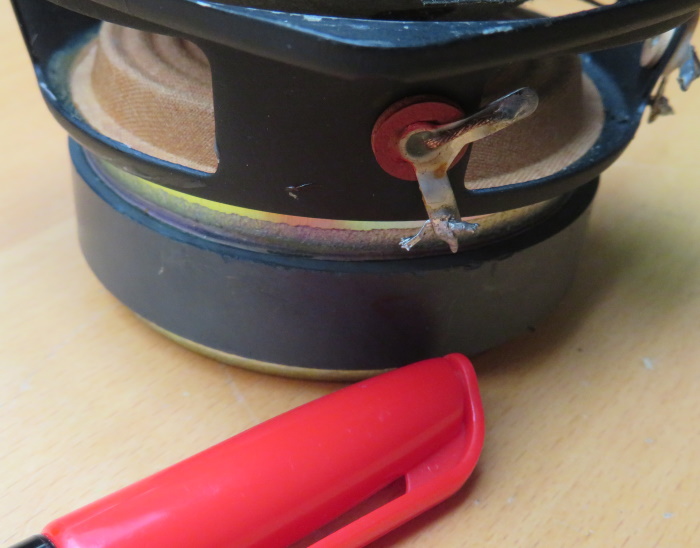
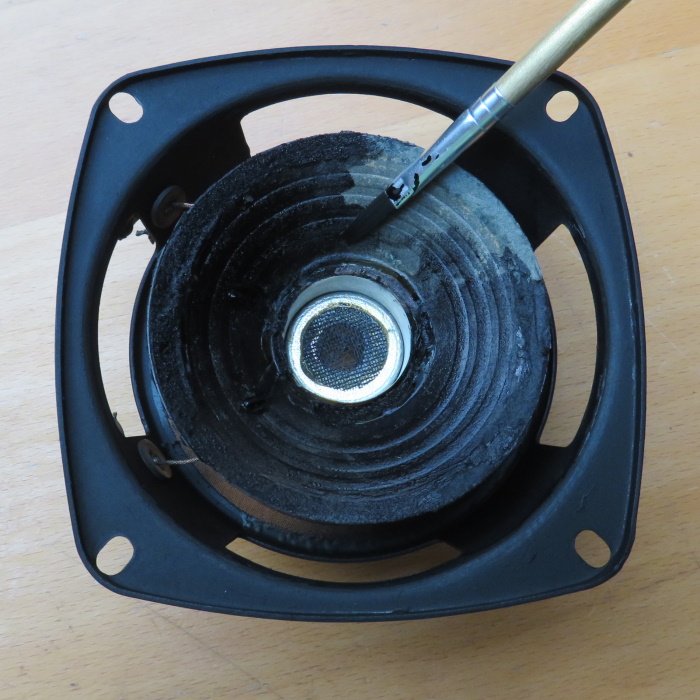
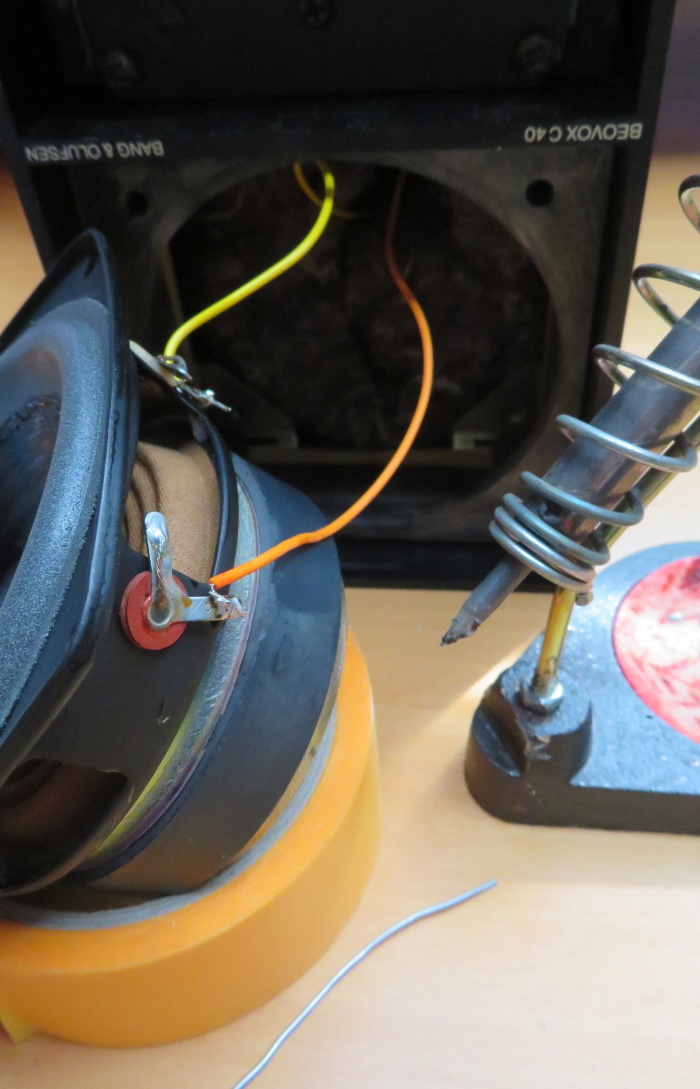
The woofer as we found it. We removed the woofer from the speaker cabinet, disconnected the (soldered) wiring and marked the terminals of the woofer.
We have marked the positive terminal with a red pen so that we can reconnect the wires correctly after the revision.
We have removed the old foam surround (mechanically, with the help of alcohol) from the cone and the frame. With paper cones, a layer of paper can come off when the foam surround is removed.
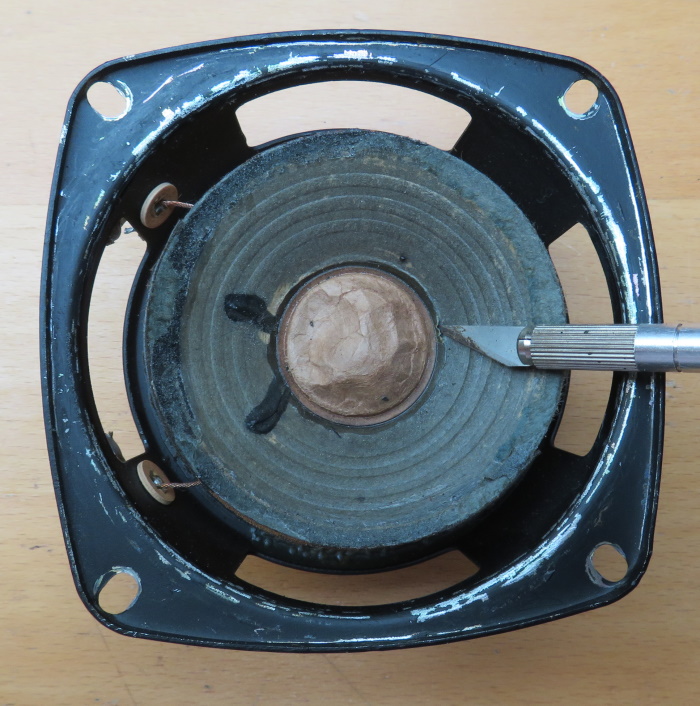
The old dust cap is removed with a sharp knife. Before you cut, determine where the tinsel wires are located. Always start cutting on the side opposite the tinsel (litz) wires. This way you avoid accidentally cutting these wires. More information in the manual 'Fit a new dust-cap'.
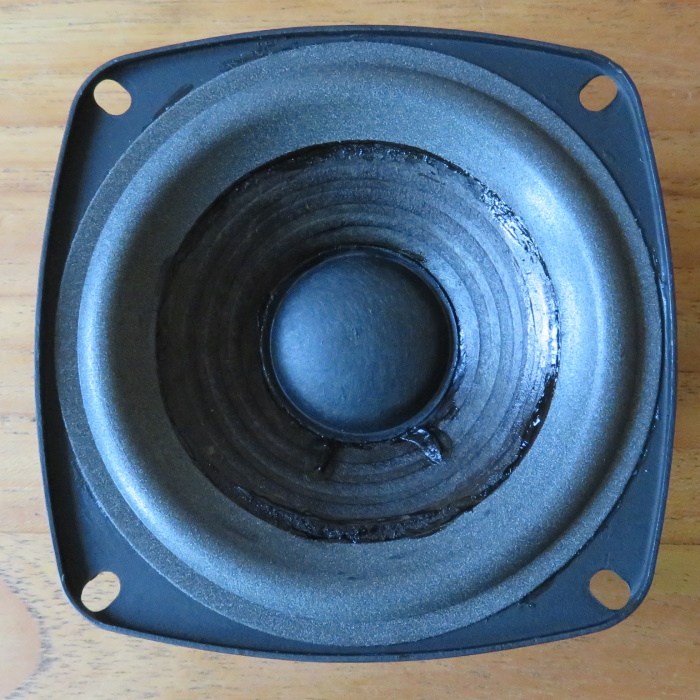
We color the frame and cone black with black ink. The ink comes from an (almost empty) ink cartridge of an inkJet printer. A very small amount of ink from the cartridge is sufficient. It is also possible to color the cone after placing the foam surround and the dust cap.
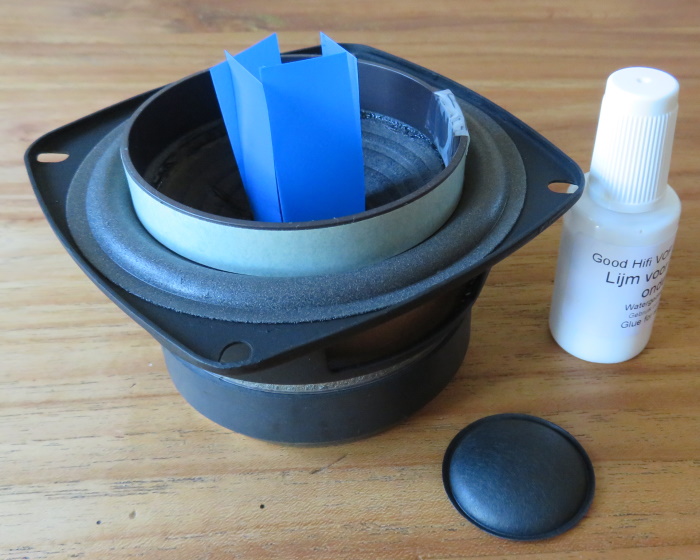
Four spacers (shims) are placed in the air gap between the voicecoil and the magnet. These ensure that the coil remains centered during the placement of the foam surround. Use thin plastic for these spacers. Paper is not suitable. Photo negatives are very suitable, but other thin plastic material can also be used.

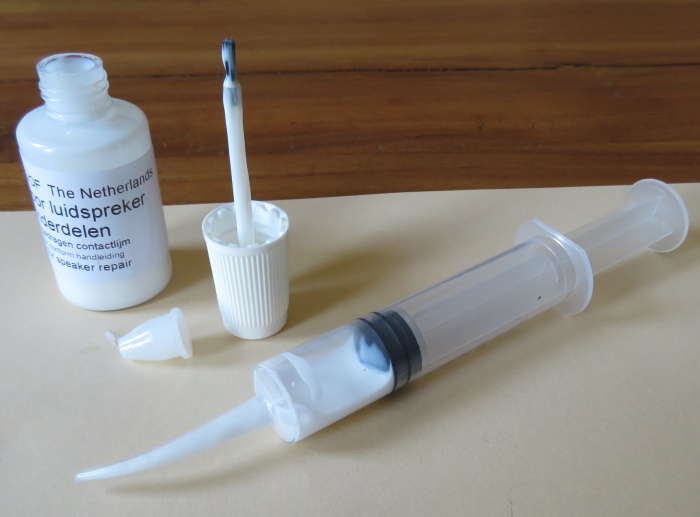
When using our glue you can use the included brush, a special applicator or another brush of your choice.
Now apply glue to the edge of the speaker cone. Use a brush or the applicator for this. A thin layer of glue is sufficient. The glue is ready to use when it has dried almost transparent.
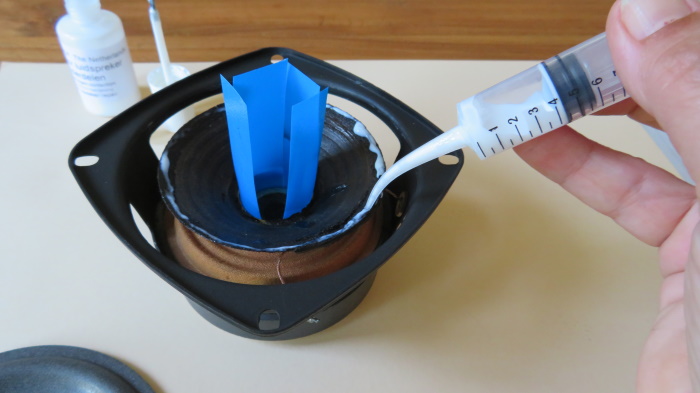
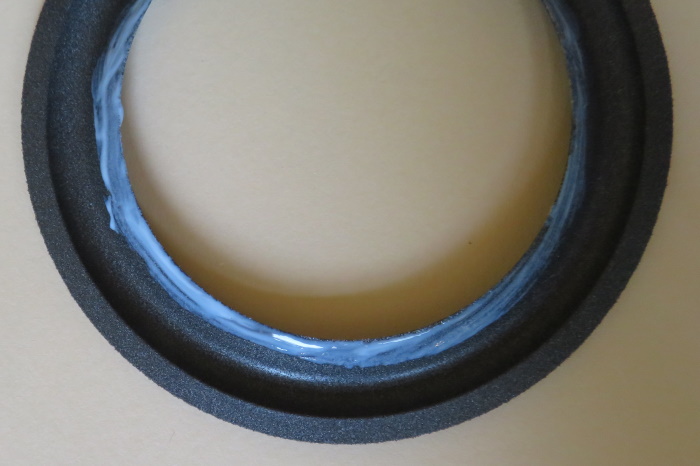
Now apply glue to the 'inner lip' of the foam surround. A thin layer is sufficient. When the glue has dried almost transparent on both the cone edge and the foam edge, glue the inner lip of the foam surround to the speaker cone.
When the foam surround is glued to the speaker cone, we place a weight on the glued pieces to keep them together nicely. Then we let the glue dry for at least six hours. A cup or glass is fine as a weight, in this photo we used a piece of metal magnetic tape.
When the glue between the foam surround and the cone is dry (the glue still feels 'rubbery', but is completely transparent), the foam surround can be glued to the speaker frame. Because the spacers keep the speaker's voice coil centered, you don't have to worry about centering. You apply the glue between the foam surround and the frame with a brush or with the applicator. After gluing, we always place a weight on the outer lip of the foam edge for (again) at least six hours.
When the foam surround is completely glued to the speaker, the spacers (shims) are removed. The new dust cap is then placed. The easiest way is to lift the dust cap by a piece of painter's tape, smear the glue edge with glue and then glue the dust cap to the cone. More info and pictures in the manual 'Fit a new dust-cap'.
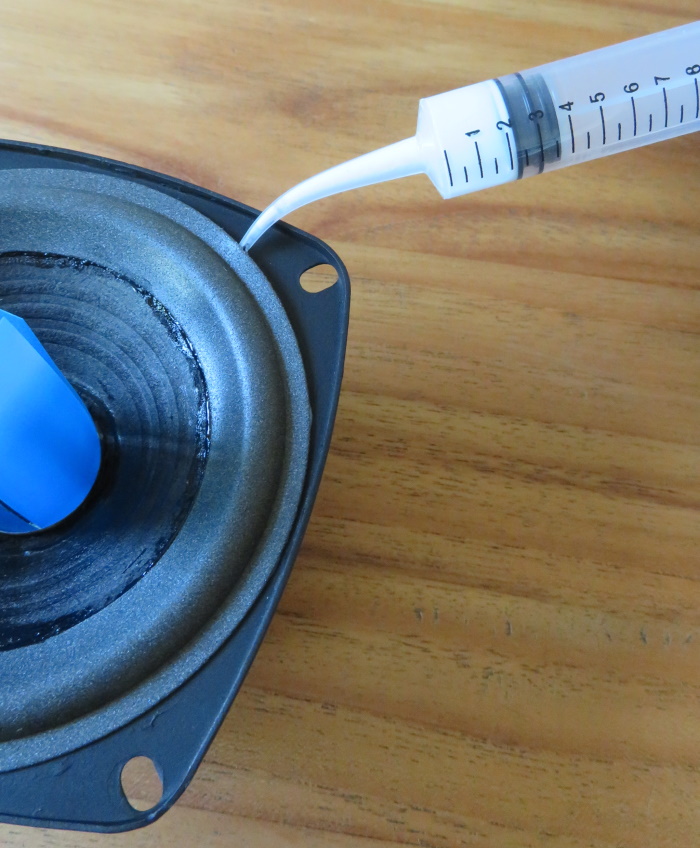
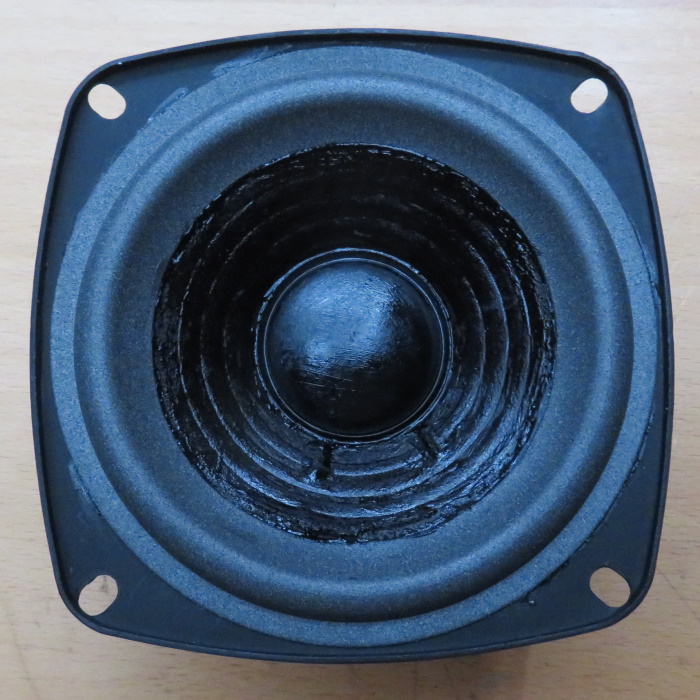
Finally, we apply a coating to the speaker cone and the dust cap to reinforce the (old) paper cone. This coating ensures that the cone gets a little more stiffness.
The woofer can now be placed back in the cabinet after soldering the connecting wires.
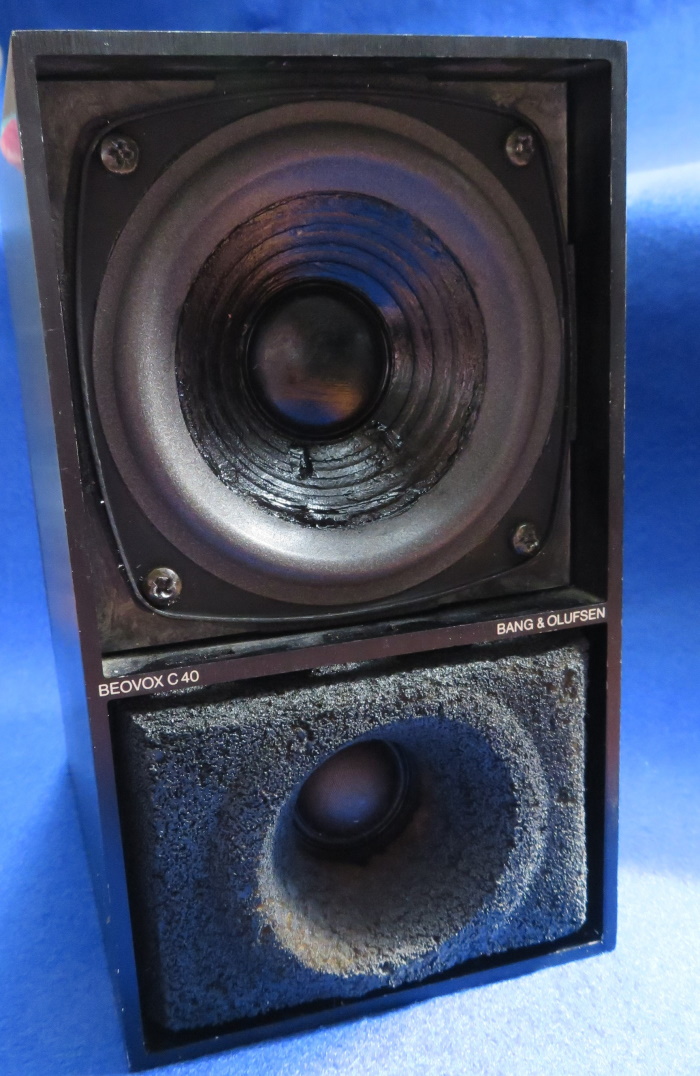
The revised woofer has been placed back in the speaker cabinet.
© Good Hifi VOF